

Add Names, Numbers to Custom Products
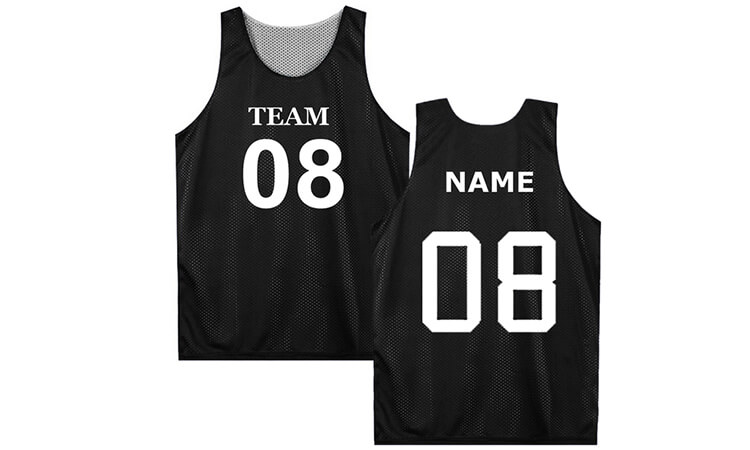
For sports players or group members, personalized apparel is a great way to show off uniqueness and increase recognition. Printing names/numbers on products can turn them into custom made specifically for each member of the group, which is suitable for team custom apparel projects such as wholesale game jerseys, practice shirts, team uniforms, etc. Choose your favorite jersey or team uniform style, then start customizing at our online design platform easily!
How to add names & numbers to a custom item with Opentip Online Design Tools?
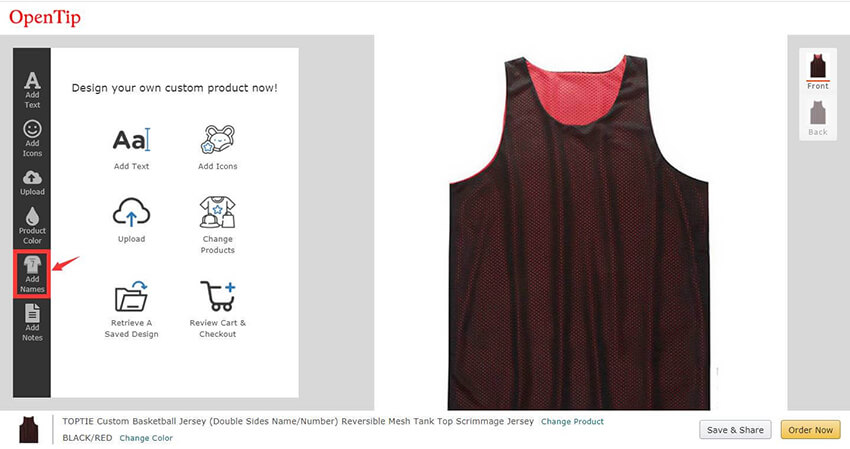
Step 1:
Click "Add Names" in the left hand design bar to add names and/or numbers to your design.
Note: In most cases, especially with our popular T-shirts and jerseys, the feature of Add Names is available to those items that need to be personalized for each member of the group. But in a few cases if you can't find "Add Names" in the left side bar, that means this feature is not available.
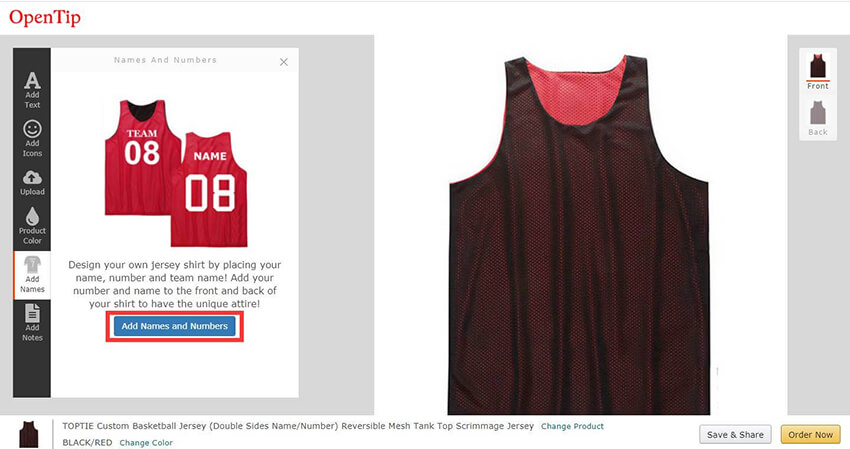
Step 2:
Once you've clicked "Add Names", you'll see the description on the screen. Make sure customization fits your order and click "Add Names and Numbers" to continue.
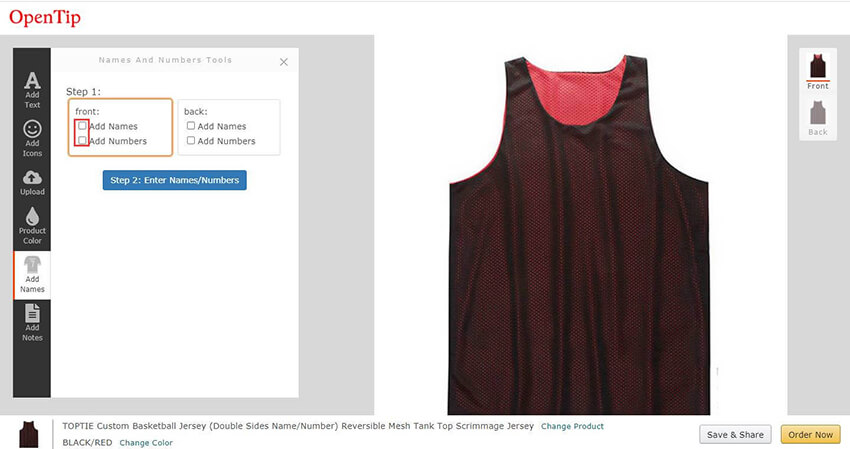
Step 3:
Click the checkboxes for Add Names and Add Numbers according to which side of the item you'd like to show your customization on -- front or back side. You can add either option alone or both options together to your order.
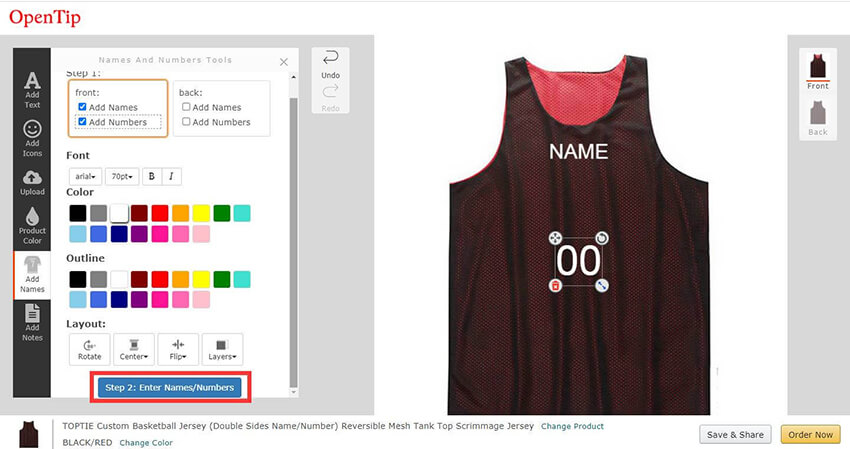
Step 4:
Now you can preview the product and see what it might look like with the design loaded in the item. You can change the font, color, outline and layout of the text. You can also drag your item to reposition your personalization wherever you'd like it to appear.
When you're ready to input names and numbers to your design, simply click "Step 2: Enter Names/Numbers" at the bottom of the screen.
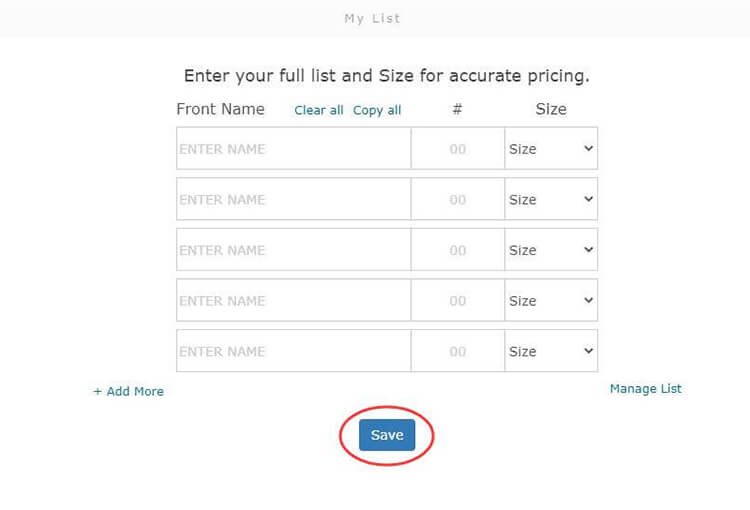
Step 5:
Here you can see a customization entry list which requires the details about your requests. Please list out every name and/or number that needs to be printed on, and choose the size as appropriate. You will only receive accurate pricing until you've completed filling out this list. If you have finished entering your personalization, click "Save".
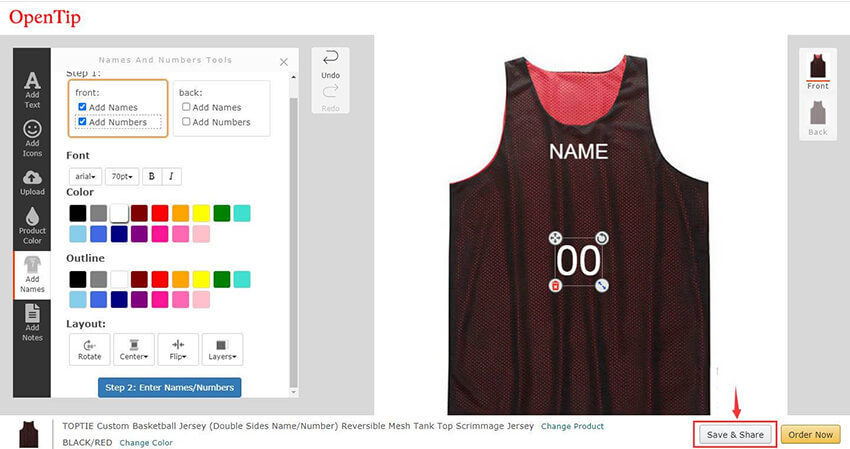
Step 6:
Click the right bottom "Save & Share" button that will appear in the main screen so that you can save your personalization design and share it with others.
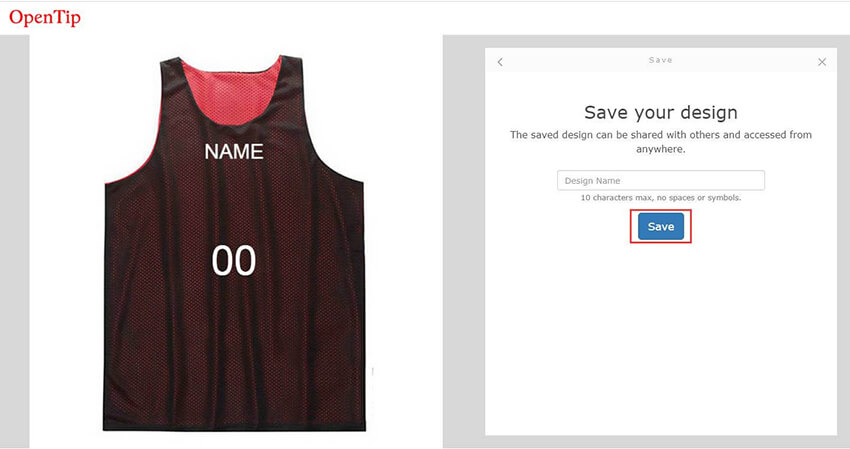
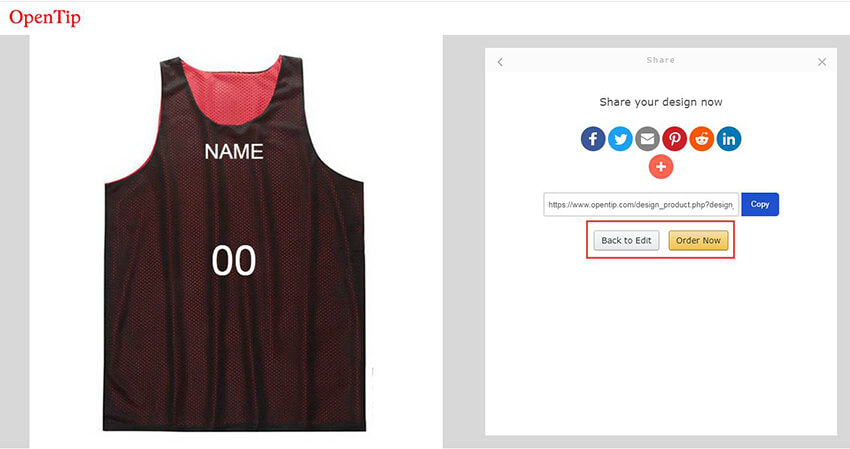
Step 7:
Give it a unique design name and click "Save". Then you can enter you desired quantities by clicking "Order Now", otherwise go Back to Edit your saved version to update a customization design for new selections.