

Help Center
Find answers to your questions
Design Online
-
How do I customize patches in the editor?
Overview
Our online editor is designed for intuitive patch customization. Whether you're uploading a logo or creating a new design from scratch, it's easy to bring your vision to life.
Step-by-Step Customization Guide
1. Choose a Patch Type
Start by selecting your preferred patch style:

Each type has different textures and design capabilities. Need help deciding? Check patch type details →
2. Select a Patch Shape
Define the base shape of your patch:
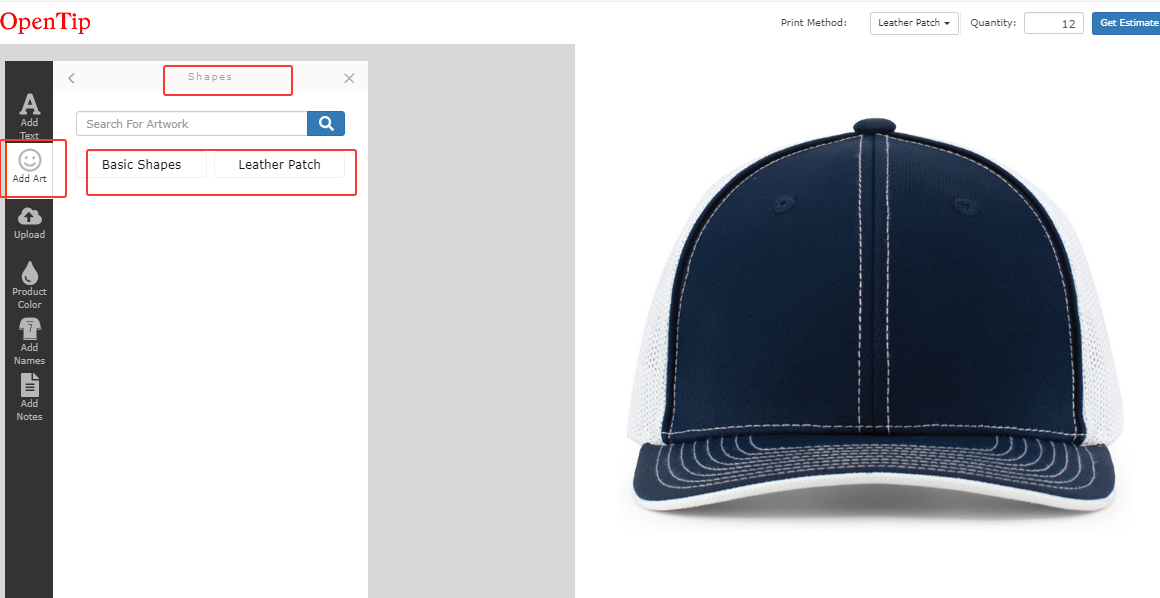
Step 1: Click "Add Art" in the design editor.
Step 2: Go to the "Shape" tab.
Step 3: Choose from the following categories:
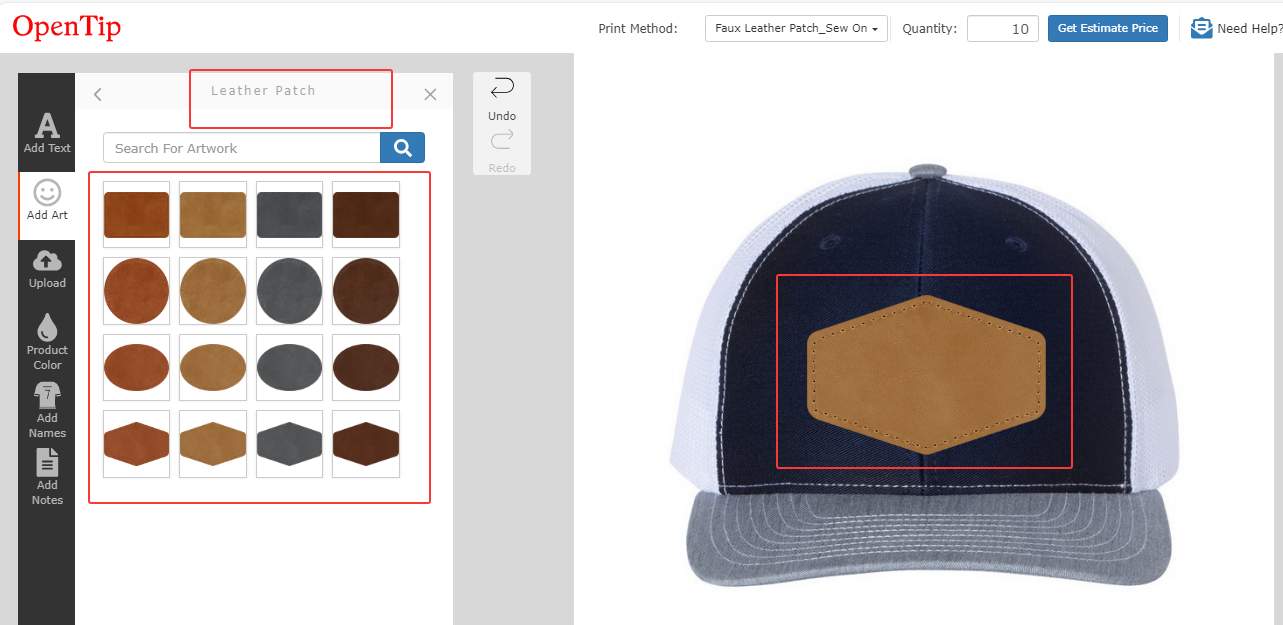
Leather Patch: Use this category if you're designing for a leather patch.
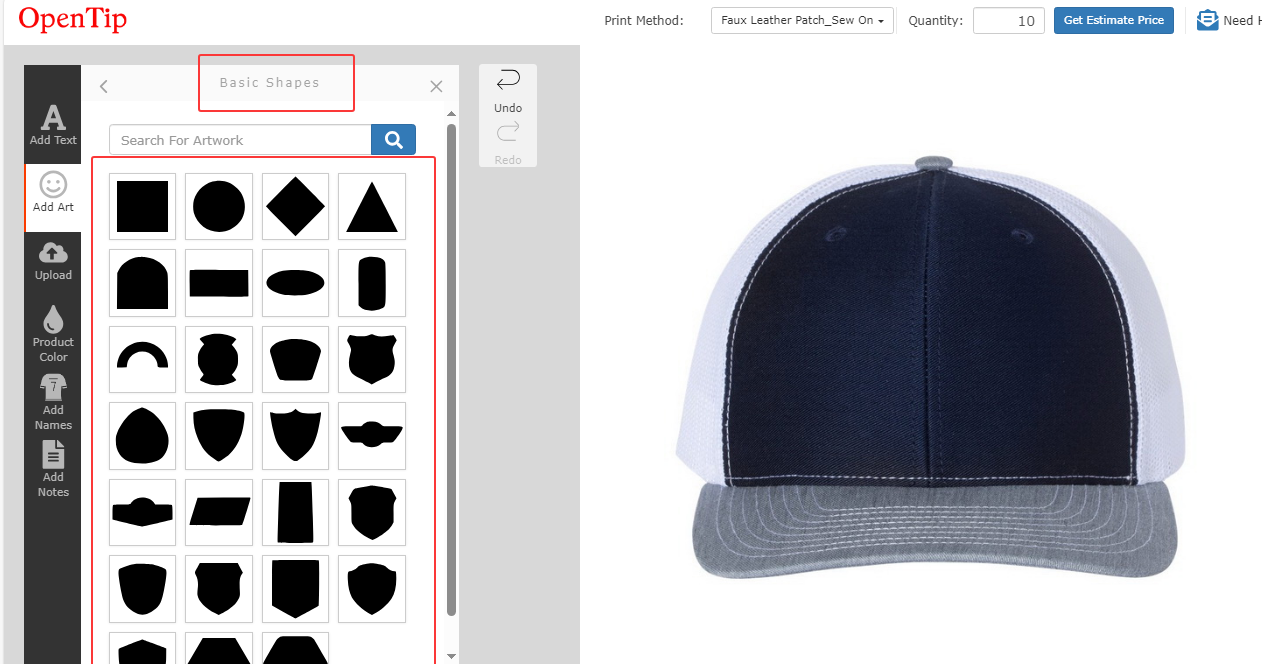
Basic Shapes: Use this category for all other patch types.
Step 4: Common shape options include:
Circle, Oval, Rectangle, Square, Shield, and more.
This step helps you define the layout area your design will be placed within.
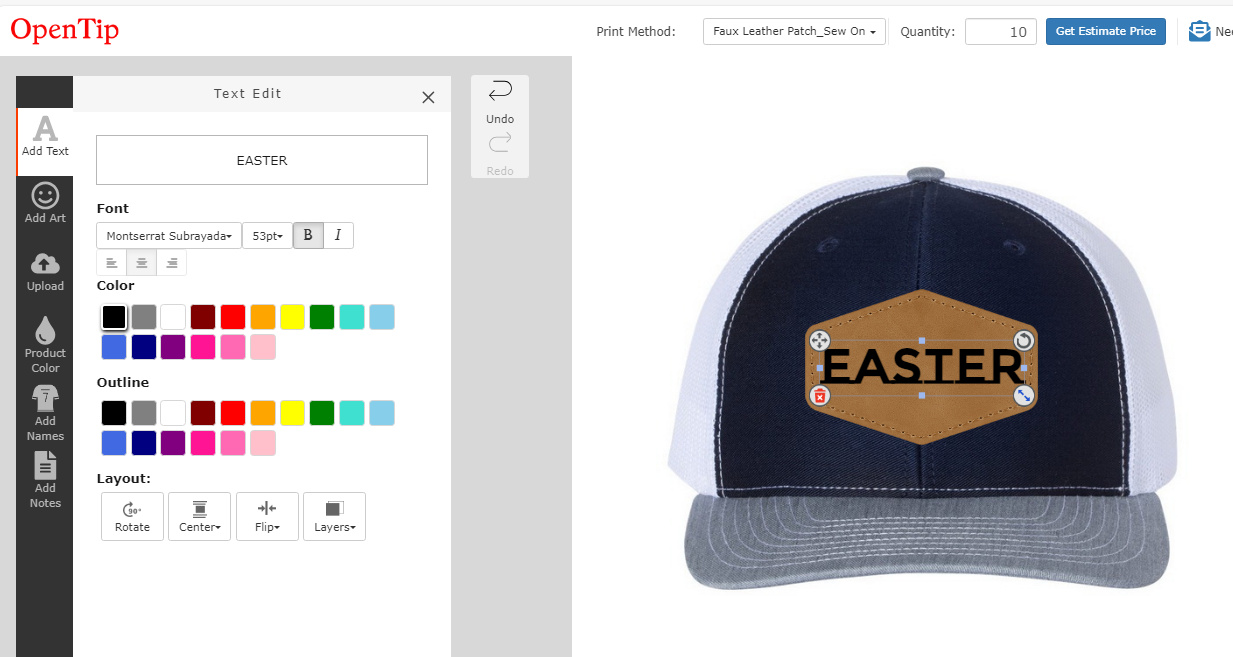
3. Add Text
Enter your message, pick a font, adjust size, alignment, spacing, and color.
4. Upload Your Artwork
Supported formats: .SVG, .AI, .EPS, .PNG, .JPG
Best results: Use vector files or 300 DPI high-res images
5. Adjust the Layout
Drag, resize, or rotate elements to fit your design perfectly on the patch shape.
6. Preview in Real-Time
See a live mockup of your patch on products like hats, bags, or apparel.
What You See Is What You Get
Our editor shows realistic mockups so you can approve every detail before ordering.
Need Help?
We offer free file checks and layout advice. Reach out to supportb@opentip.com if you're unsure about file quality, placement, or matching your design to the selected patch type.
Was this answer helpful?
NO