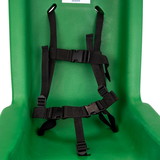
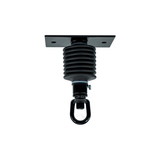
Jensen Swing SP205b - Spring Rider Boot Replacement
Brand Jensen Swing
Shop more from JEN
* Click "Add to Cart" to calculate shipping and delivery time.
Product Description
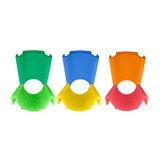
This is the replacement boot for Spring Riders. This product should last 2 years in harsh conditions and up to 5 years in optimal conditions. Some conditions may require replacement sooner. Tensile 1200 lbs.
This is for children 2 - 12 years old only. These are designed for use by one child at a time. Adults should supervise children at all times. Do not allow children to stand on or use unsafely. Do not allow it to be used if damaged.
IMPORTANT: Please read for important information. In this material we have tried to provide some requirements stated in the CPSC Handbooks, ASTM F2373-11, F1487-11 and F1148-09. However, we in no way intend for this to be a complete list of requirements. Also these publications are updated frequently with changes therefore, you should read these publications yourself to determine if any part or installation could prove a danger to a child.
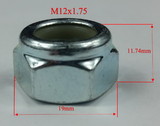
To help keep children safe from harm, review installation and maintenance instructions before installing equipment. These are located in the description of every product on our website. Download and print these instructions and keep in a safe place. Our website also has a "Product Testing Information" page. All products are tested for lead, phthalates and tensile strength. The hole size may vary depending on local soil, weather conditions and local laws. Attach spring to bottom plate using SPR casting. These have built in threads. Slide SPR casting through coil of spring. Position casting and attach with ½" x 1 ¾" H.H.B. and ½" lock nuts. Tighten bolts.
Slide SPR casting through coil of spring positioning casting so that it faces the same way as lower casting. Slide spring cover over spring. Compress spring cover and attach spring to top plate using SPR casting. Attach to top plate using ½" x 1 ¾" Hex Head Bolt and ½" lock nuts. Tighten bolts.
Pour concrete into footing hole and level off. Using 10" x 10" bottom plat on assembled spring as a template, insert ½" anchor bolts into the concrete. Remove spring assembly. Allow to set 2 - 3 days.
*NOTE: Allow enough thread on anchor bolts to secure bottom plate to footing.
Attach body to spring assembly using 3/8" x ¾" H.H.B. and 3/8" lock nuts. Tighten nuts and bolts. Place assembled body into position. Attach bottom plate to anchor bolts using ½" lock nuts and ½" flat washers. Tighten nuts and peen bolts. Install resilient surfacing material.
Maintenance: At beginning and end of each play season and once a month during play season, check for cracks, rust, missing or loose hardware or evidence of vandalism. Make sure there are no tears in rubber boot that children could get their fingers pinched in spring. Tighten and lubricate all metallic moving parts. Replace as needed. Make sure there are no exposed footings, anchoring devices, rocks, roots, holes or any other obstacles in or around spring animals. Maintain detailed inspection and maintenance records for public-use playground equipment.
Any damage from vandalism, abuse or misuse VOIDS all warranties.
| Weight (lbs) | 3 |
|---|---|
| Dimensions (in) | 16 X 12 X 8 in |
 Attention CA Residents: Prop 65 Warning
 WARNING:
This product can expose you to chemicals which are known to the State of California to cause cancer, birth defects, or other reproductive harm. For more information, go to www.p65warnings.ca.gov.
Need more information?
Our staff are available to answer any questions you may have about this item
Our staff are available to answer any questions you may have about this item


