


5 out of 5


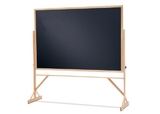
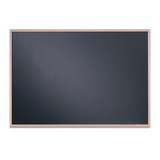
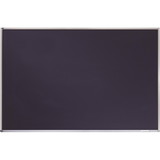
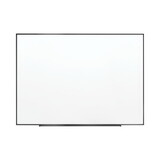
Quartet Porcelain Black Chalkboard, Magnetic, 4' x 6', Aluminum Frame, PCA406B, Price/each
* This item must be ordered in multiples of 2.
Product Description
Price is for each.
Manufacturer Part Number: PCA406B
Overview
Active classrooms that are used dailyneed heavy duty chalkboards that teachers and students can rely on. A porcelain surface boardfeatures a durable, smooth writing platform that is guaranteed to last and deliver superior performance.
Features
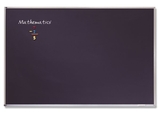
- Porcelain, magnetic chalkboard surface will not stain, ghost, scratch or dent
- Designed for heavy use in a busy, educational setting
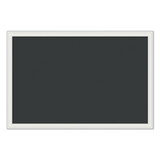
- Black surface chalkboard is 4' x 6' in size
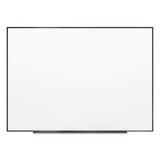
- Anodized, satin-finish aluminum fits in with any classroom design
- Cradle to CradleCM Silver certified porcelain, certified for material content, recyclability and sustainable manufacturing processes
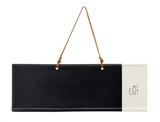
- Hanging system and accessory tray included
- Made in the USA
- Lifetime surface warranty
Specifications
Color Group Black
Detailed Color Black
Frame Aluminium
Frame Finish Silver Aluminum
Mounting Hardware Type Surelock
Orientation Landscape
Period of Warranty 50-year
Standard Board Size 4' x 6'
Use Frequency Heavy Use
Dimensions 48" x 72"
Detailed Information
Color NC
Layer/Pallet 15
Cases/Layer 1
Weights & Dimensions
Case information
Depth 78"
Width 54.38"
Height 3.25"
Weight 50.15lbs
UPC# 034138540657
Each information
Depth 3.25"
Width 54.375"
Height 78"
Weight 50.15lbs
UPC# 034138540657
Pallet information
Depth 80"
Width 55"
Height 52.25"
Weight 836.25lbs
UPC# 70034138540656
Shipping Information
Country of origin US
Lowest possible unit Each
This item is oversize. we may contact you when we process the order.
 Attention CA Residents: Prop 65 Warning
WARNING:
This product can expose you to chemicals which are known to the State of California to cause cancer, birth defects, or other reproductive harm. For more information, go to www.p65warnings.ca.gov.
Need more information?
Our staff are available to answer any questions you may have about this item
Our staff are available to answer any questions you may have about this item
Customer Reviews
By A Customer
Date: September 28, 2023
I got the 6ft x 4ft to put on my office wall behind my desk. I was apprehensive about attempting to use the dry-wall anchors that came with this (as you really wouldn't have much room for error), so I put a 6' support board on the wall, which I could anchor into studs. Then I could trash the dry-wall anchors and instead just screw the dry-erase directly into the support board.I'm happy with this.Mounting Tip: It came with dry-wall anchors and philips head screws. Philip's head screws are basically single use, no mistakes screws. Nobody should be using these anymore, and vendors should not be providing them.If you go the route I went and anchor a support board into studs, here are some tips: The 6'x4' is darn near exactly 72 by 48 with the mounting holes offset in a couple inches. So you can make your mounts slightly in (to hide under the board) and still have room to screw the dry-erase board into the supports. You don't have to sweat about pre-drilling the exactly placement of all 6 mounting holes...If you get just the middle top screwed in, the board is maneuverable enough to slide the mounting spacers under the board to screw in place as needed.
Rating:  [5 of 5 Stars!]
[5 of 5 Stars!]
By SLOTEXAN
Date: July 28, 2023
It looks beautiful in my office. I get compliments all the time.
Rating: [5 of 5 Stars!]
[5 of 5 Stars!]
By JJ
Date: July 20, 2023
We deliberated over getting the black version of this wipe board (we have a few clear/frosted versions of these boards in our office). We got the 6 X 4 size and it is awesome! so sleek and easy to install (although it is heavy so use 2 people!). Do keep in mind that you need to use the Quartet fluorescent or white markers on the board. They are sometimes a little bit harder to find but worth it.
Rating: [5 of 5 Stars!]
[5 of 5 Stars!]
By Tomy
Date: July 11, 2023
As you've likely seen in other reviews, this board is beautiful but is an absolute burden to install. So, first, let me start with the good stuff, and then let me wrap back around to some tips for installation that helped me.First, the good. It's beautiful. Fully glass with a metal backing (I got the black one since it looks sleek), it's extremely beautiful and sturdy. The floating style is really cool and gives it an extra decorative dimension to it. The wall attachment bolts are really nice, too, as they're a brushed metal that gives it a modern feel. The board itself is super easy to use. It's very smooth and the Quartet markers look amazing on it, and the eraser is great, too. (Note: the board only comes with one white marker and no eraser, so you'll have to buy extras separately.) So all of that is great. I will say, however, the marker/accessory tray came slightly bent in two areas. I had to fix it with some pliers, which is whatever. Easy enough.The installation, however, was a real burden, and took me several tries and solutions to figure out how to do it efficiently. We even dropped it once on the corner, and it didn't dent, shatter, or break at all, thank goodness. So I hope my burden will save you time. Here's what I recommend: first, there's no way to do this with one person, or even two people, really. I got the 6'x4' version, which is about 65 lbs or so. That doesn't sound overly heavy, except at that size it's very awkward to try to lift and handle. So what I ended up doing, which allowed us to install it in less than a half an hour, is this: put a table underneath where you plan to put the board. Then, stack several (we used three, but use as many as you're comfortable doing) books so that the board reaches the preferred height. Preferably, use books that have a spine, and put the spine against the wall so that the crease is next to the wall. Using at least two but preferably three people, lift up the board and use the book spines as a guide to hold it in place. As one person (or two people) ensures the stacks of books remain in place, have one person hold the board up against the wall, while a fourth person (yes, a FOURTH person) uses a pencil to outline the circles where the board will be attached to the wall. You HAVE to do it this way -- do not try to use math. It will not work. Do not try to use the cardboard or pieces of paper as a template -- it will not likely work. Just use the board, even though it's a burden to do it. After you have your circles, take the board down and install the anchors and other attachment bolts. Then put the board back up on the stacks of books as you very carefully hang the board on to each bolt. Since there is literally NO wiggle room, you might need to bring back out a screw (so the bolt will be a bit loose), fix the bolt so that it goes through the hole in the glass, and then screw back in the bolt. You'll probably have to do that on all of them, but it's fine, so long as you have someone holding the board up and ensuring the book stacks remain stable. Once you have all the bolts in, tighten them by hand and voila, you're finally done (and probably lost a few calories in the process).While the installation was a real workout, I highly recommend the board. It's stunningly beautiful and works amazingly. It nicely complements my office, allows me to do virtual lectures that look amazing for my viewers and students, and, honestly, just looks super cool. Once you get past the installation, it'll be well worth it. Hopefully with the tips above it'll make things simpler for you.
Rating: [5 of 5 Stars!]
[5 of 5 Stars!]
By Office purchase
Date: April 10, 2023
This delivered very quickly. Easy to install.
Rating: [5 of 5 Stars!]
[5 of 5 Stars!]
By Kindle Customer
Date: March 20, 2023
This is an incredible nice whiteboard. If you do a lot of discussion and planning this is the right tool. It is easy to clean and doesn't seem to get permanently nasty over time a easy clean with a spritz of water and non scratch towel and you are ready to go againThe mounting system they provided was pretty garbage. This thing is crazy heavy and the dry wall mounts they provided were inadequate.
Rating: [5 of 5 Stars!]
[5 of 5 Stars!]