Jensen Swing SP250M - Rotationally Molded Spring Ride Motorcycle - USA
Brand Jensen Swing
Shop more from JEN
Product Description
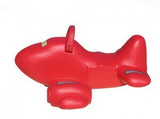
The airplane and motorcycle are made of a durable rotationally molded polyethylene with weather resistant decals. They come in bright colors that resist fading. Each one comes with a spring that is enclosed by a rubber boot, which helps to prevent pinching and provides a smooth ride. Decals are applied with heat. They will be hard to remove and resist fading. The airplane dimensions are 9" from ground to seat, 15" from bottom to top of airplane cabin and is 36" from front to back. The motorcycle is 18".from ground to seat. 25" from bottom to top of handles and is 35" front to back. The plate is 10" square 8.25" center to center.
Colors: Blue, Green, Red and Yellow
This is for children 2 - 12 years old only. These Rock n r rides are designed for use by one child at a time. Adults should supervise children at all times. Do not allow children to stand on or use unsafely. Do not allow it to be used if damaged.
IMPORTANT: Please read for important information. In this material we have tried to provide some requirements stated in the CPSC Handbooks, ASTM F2373-11, F1487-11 and F1148-09. However, we in no way intend for this to be a complete list of requirements. Also these publications are updated frequently with changes therefore, you should read these publications yourself to determine if any part or installation could prove a danger to a child.
To help keep children safe from harm, review installation and maintenance instructions before installing equipment. Our website also has a "Product Testing Information" page. All products are tested for lead, phthalates and tensile strength.
Regardless of lower heat transfer properties, plastic play equipment can still become hot enough -- in extreme temperatures and direct sunlight -- to cause burns. Plastic slides are safe, tried and true, but as is the case with all playground equipment, parents and supervisors must monitor the children in their care, make certain that the equipment is appropriate for their age, and always check playground surfaces for excessive heat before allowing children to play. For more information, contact IPEMA headquarters at www.communications@ipema.org or by calling 1-717-238-1744.
Installation: Our parts are sold as either replacement parts or components of a set, unless you are buying our Metal Frame Set, therefore these parts need to be installed according to the sets installation instructions.
For toddlers seat should be between 12 - 16" high. For preschooler seat should be between 14 - 28" high. The use zone should be a minimum of 6' from the "at rest" perimeter of equipment. It may overlap in certain instances. See CPSC for more information. Determine correct footing locations and dig footings. The hole size may vary depending on local soil, weather conditions and local laws. Attach spring to bottom plate using SPR casting. These have built in threads. Slide SPR casting through coil of spring. Position casting and attach with ½" x 1 ¾" H.H.B. and ½" lock nuts. Tighten bolts.
Slide SPR casting through coil of spring positioning casting so that it faces the same way as lower casting. Slide spring cover over spring. Compress spring cover and attach spring to top plate using SPR casting. Attach to top plate using ½" x 1 ¾" Hex Head Bolt and ½" lock nuts. Tighten bolts.
Pour concrete into footing hole and level off. Using 10" x 10" bottom plat on assembled spring as a template, insert ½" anchor bolts into the concrete. Remove spring assembly. Allow to set 2 - 3 days.
*NOTE: Allow enough thread on anchor bolts to secure bottom plate to footing.
Attach body to spring assembly using 3/8" x ¾" H.H.B. and 3/8" lock nuts. Tighten nuts and bolts. Place assembled body into position. Attach bottom plate to anchor bolts using ½" lock nuts and ½" flat washers. Tighten nuts and bolts. Install resilient surfacing material.
Maintenance At beginning and end of each play season and once a month during play season, check for cracks, rust, missing or loose hardware or evidence of vandalism. Make sure there are no tears in rubber boot that children could get their fingers pinched in spring. Tighten and lubricate all metallic moving parts. Replace as needed. Make sure there are no exposed footings, anchoring devices, rocks, roots, holes or any other obstacles in or around spring animals. Maintain detailed inspection and maintenance records for public-use playground equipment.
Any damage from vandalism, abuse or misuse VOIDS all warranties.
| Weight (lbs) | 31.15 |
|---|---|
| Dimensions (in) | 39 X 16 X 11 in |
This item is oversize. we may contact you when we process the order.
 Attention CA Residents: Prop 65 Warning
 WARNING:
This product can expose you to chemicals which are known to the State of California to cause cancer, birth defects, or other reproductive harm. For more information, go to www.p65warnings.ca.gov.
Need more information?
Our staff are available to answer any questions you may have about this item
Our staff are available to answer any questions you may have about this item


